
When data security is paramount, knowing how to password-protect an Excel file is essential for safeguarding sensitive information.
This guide will walk you through ways to secure your Microsoft Excel files with passwords and encryption, ensuring only authorized individuals can access and modify the files.
The basics of Excel spreadsheet protection
Excel and Google Sheets help users identify data trends and sort heaps of information into meaningful insights. Password-protecting these files helps safeguard your data, intellectual property, and hard work from unauthorized access and unintended changes.
Excel has built-in password protection and encryption features to lock certain aspects of your document and restrict file access. However, Google Sheets doesn’t come with this built-in functionality. To apply password protection to a Google Sheet, you’ll need to use a template that contains an Apps Script code.
Therefore, if you need to password-protect your spreadsheets, Excel might be the simpler option for you.
Here are the top reasons Excel users might want to lock their files:
- Security: When a password is required to open Excel, it helps keep sensitive data confidential and prevents unauthorized access.
- User error prevention: Password protection or restricting permissions can prevent accidental or unintentional modifications to Excel files, reducing the risk of data loss or corruption caused by user error.
- Version control: With Excel's version control feature, only authorized individuals can track, review, and approve changes, helping maintain data integrity and consistency over time.
- Intellectual property protection: Excel workbooks may contain proprietary formulas, calculations, or business strategies that provide a competitive advantage. Password-protecting an Excel file safeguards intellectual property from unauthorized access or being copied.
Choosing the right level of password protection in Excel
Various levels of protection can be applied to cells, worksheets, or the entire workbook:
- Workbook protection: Putting a password on an Excel file protects your entire workbook, restricting access to view, modify, or even open the file without the correct password.
- Encryption: Excel file encryption allows you to encrypt the entire workbook with a password. Encryption ensures that even if someone gains unauthorized access to the file, they won't be able to view or modify its contents without the decryption key.
- Hidden sheets: Excel allows users to hide worksheets, often for behind-the-scenes calculations or reference data.
- Worksheet protection: Excel allows you to password-protect individual worksheets, preventing users from inserting or deleting sheets, modifying cell contents, or altering formatting.
- Cell protection: In Excel, specific cells, rows, or columns can be locked to restrict editing or formatting changes, preventing accidental modifications or version control issues.
Locking worksheets and cells with a password isn’t a security feature. It simply prevents modifications to the locked sections of the workbook. To restrict access to an Excel file, you must require a password to open the file.
How do you password-protect an Excel file?
Adding a password to an Excel file keeps your data safe from tampering by anyone who's not authorized to access or edit the file.
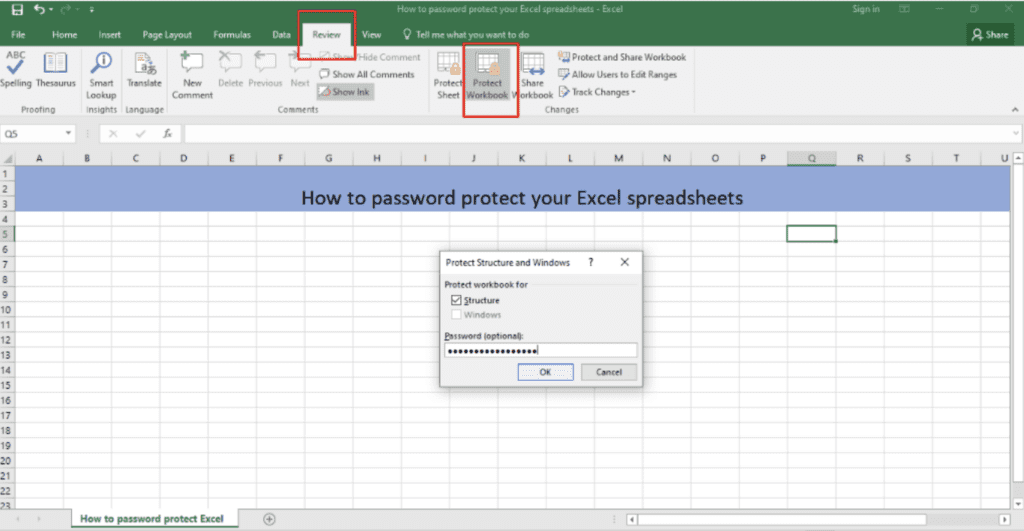
Here’s how to password-protect an Excel file
- Go to the Review tab.
- Select Protect Workbook from the Changes group.
- In the Password field, enter the password of your choice and select OK.
- In the Confirm Password box, re-enter the password and select OK.
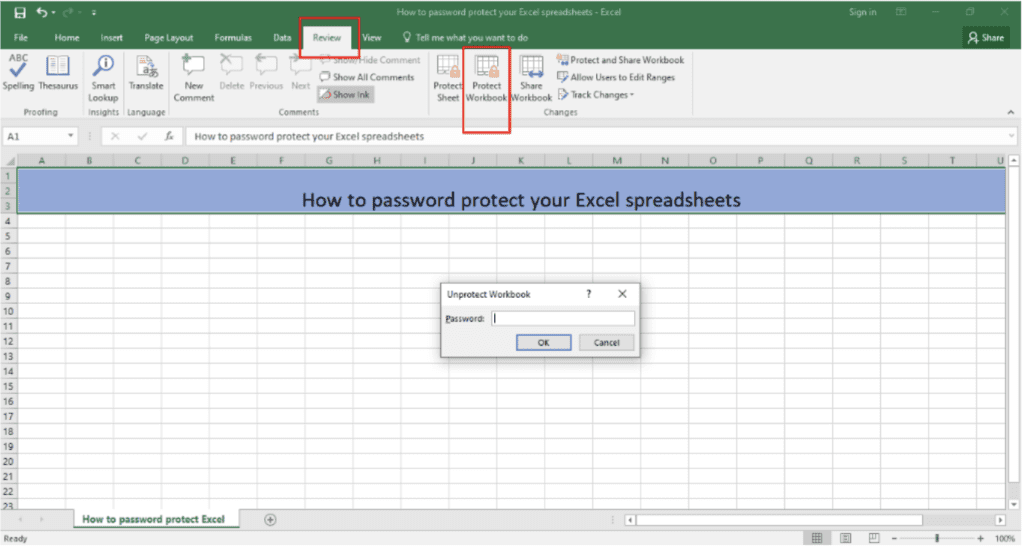
Follow these steps to change or remove your Excel file password:
- Navigate to the Review tab.
- Select Protect Workbook.
- If your workbook is password-protected, an Unprotect Workbook box will appear.
- Enter the password to unprotect your workbook.
- Once you remove the password, you can set a new password by selecting Protect Workbook under the Review tab.
Sharing sensitive data or logins through email or instant messaging apps isn’t secure. Use Dashlane's group sharing feature to encrypt your data before sending it over the internet.
Encrypting an Excel document
In Excel, you can take password protection to the next level by encrypting your file. Encrypting files in Excel provides enhanced security by transforming sensitive data into a coded format, making it unreadable to unapproved users and ensuring the confidentiality of your information.
Password protection vs. encryption
Password protection requires a password to open the Excel file. Adding a password restricts access to the file only, meaning anyone who knows the password can open and modify the document.
Encryption takes security a step further by converting the file's contents into a complex code that’s difficult to decrypt without the encryption key. That means even if someone accesses your file, all they’ll see is scrambled data. Microsoft uses AES-256 encryption, one of the most advanced encryption algorithms.
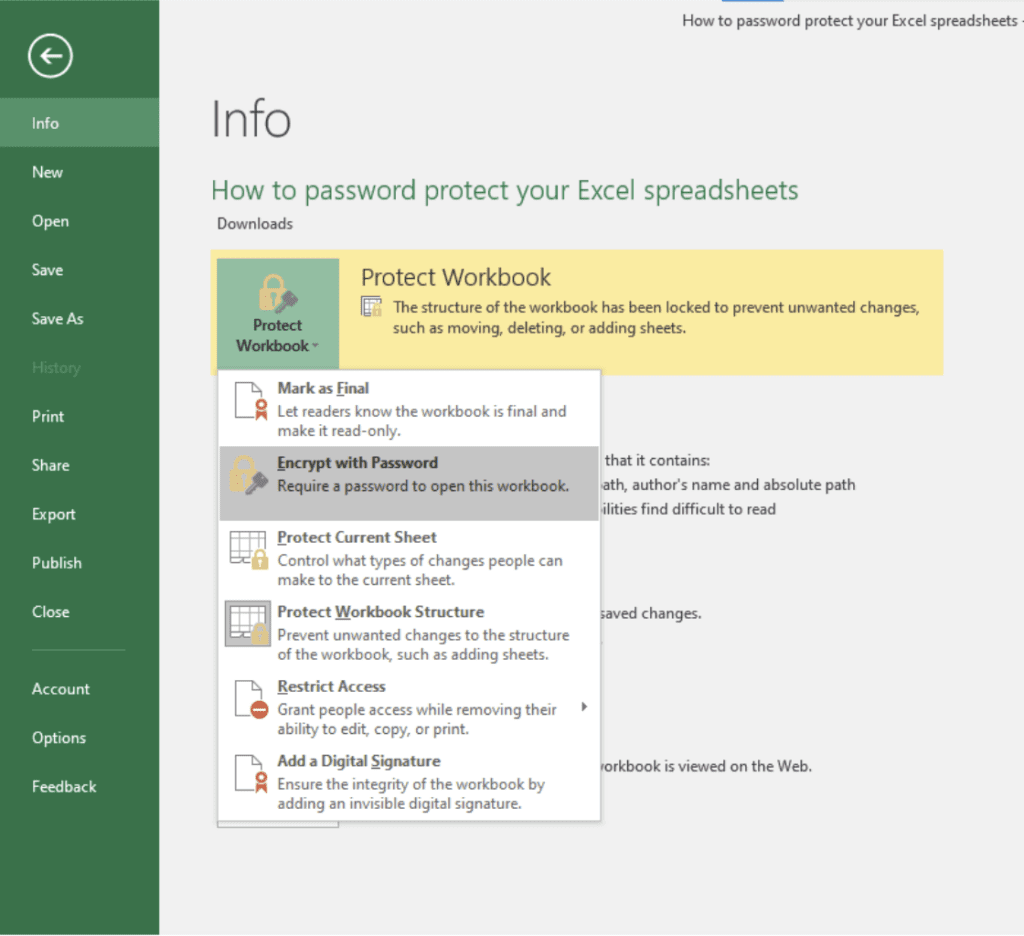
Encrypt your Excel workbook with this quick tutorial:
- Go to File and select Info.
- Select Protect Workbook.
- From the list menu, select Encrypt With Password.
- In the Encrypt Document pop-up, enter a password in the Password field and select OK.
- Re-enter the password in the Re-enter Password field and select OK.
- Save the workbook.
Allowing read-only access in Excel
Let's say you want to share an Excel file detailing your weekly reports with your team. However, you only want your manager to be able to edit because you don't want to risk any accidental modifications from your other team members.
In this case, you can allow read-only access to your file.
Why or when should you use read-only?
When dealing with complex Excel spreadsheets that contain valuable data and intricate formulas, saving the file as read-only provides automatic protection against unintended modifications.
This feature is especially beneficial when sharing the spreadsheet with colleagues or clients, as it prevents accidental edits or manipulation. Read-only access can also be advantageous for personal use, such as preserving the integrity of final versions of files.
How to make your Excel file read-only:
- Go to the File menu and select Info.
- Select Protect Workbook.
- Select the Always Open Read-Only option.
Best practices such as version control and access restrictions foster a culture of security among employees, preventing unauthorized access to sensitive business information and unintended file changes.
Protect the structure of an Excel workbook from editing
Excel not only lets you protect your workbook, but it also allows you to lock the structure of your workbook. Choosing to protect the structure of your workbook prevents unauthorized users from:
- Accessing hidden worksheets.
- Making any modifications, including renaming, moving, hiding, or deleting sheets.
- Adding new sheets or chart sheets, although they can insert charts in existing worksheets.
- Moving or copying sheets to another workbook.
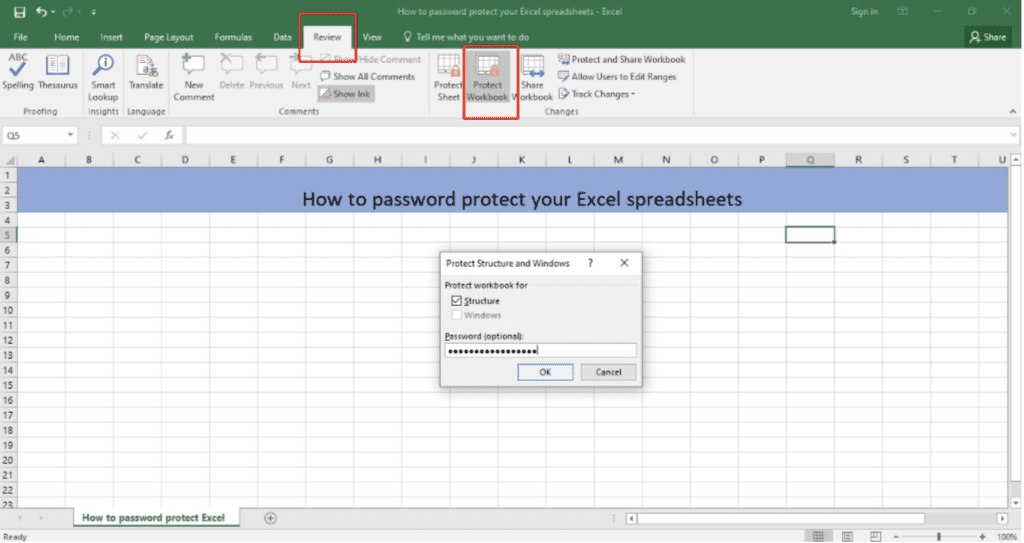
Password-protect your Excel workbook structure with these easy steps:
- Go to the Review tab.
- Select Protect Workbook in the Changes group.
- Check the Structure checkbox.
- In the Password field, enter the password of your choice and select OK.
- In the Confirm Password box, re-enter the password and select OK.
Protect individual worksheets from being edited
If you don't want to protect the entire workbook, you can choose to protect individual worksheets instead.
Workbook protection vs. worksheet protection
Workbook protection involves securing the entire Excel file to prevent unauthorized access and modifications.
On the other hand, worksheet protection allows you to secure specific worksheets within the workbook by restricting certain actions, such as editing cells, formatting, or deleting data, while leaving other sheets accessible for editing.
How to lock an Excel worksheet with a password:
- Go to the Review tab.
- Select Protect Sheet in the Changes group.
- In the box, select Protect Worksheet at the top.
- Next, enter the password of your choice.
- If you want to allow specific actions, check the corresponding boxes and select OK.
- In the Confirm Password box, re-enter the password and select OK.
Protect specific cells in an Excel workbook from editing
In your Excel workbook, locking cells is beneficial when you want to protect specific data or formulas from accidental or unauthorized changes. Locking cells is essential when sharing spreadsheets with others, collaborating on projects, or creating templates or models where specific cells should remain unchanged.
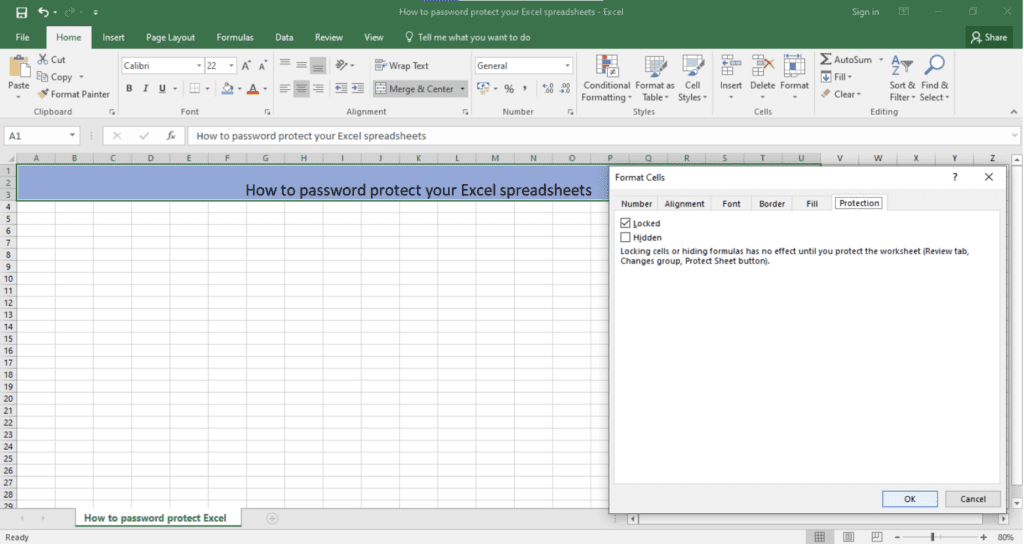
How to password-protect cells in an Excel file:
- Select the cells you want to protect.
- Right-click on them and select Format Cells.
- Go to the Protection tab and check the Locked checkbox.
- Select OK.
- The selected cells will be locked once you password-protect the worksheet.
Excel password management tips
With the average person managing over 200 account passwords, adding Excel passwords to the list can feel overwhelming. Managing multiple passwords and safely sharing passwords with team members can be simplified with best practices and the right tools.
What happens if I forget or lose my passwords? Can Microsoft retrieve them?
In Excel, you can lock and password-protect your workbooks and worksheets. However, there’s no straightforward recovery method if you forget or misplace these passwords. Unfortunately, Excel doesn’t store spreadsheet protection passwords, and Microsoft can’t retrieve them for you.
Even though Excel doesn't provide a direct way to recover forgotten or lost passwords, there are third-party software tools available that claim to help recover Excel passwords. The effectiveness of these tools may vary, and you should use them with caution and ensure they are from reputable sources.
It's always best to keep your passwords in a safe location, and if you share them with colleagues, use a secure method.
Keep passwords safe and share them securely with coworkers using a password manager
When it comes to cybersecurity, it’s best practice to use a unique password for every online account, app, and password-protected file. The ideal way to create and store your passwords is with the help of a password manager.
A password manager can generate strong passwords for you and store them securely in an encrypted vault that’s protected by a master password only you know. It eliminates the need to create and remember a new password for every account and file.
Dashlane Password Manager also enables you to securely share passwords, Secure Notes, and files with coworkers. Secure sharing ensures your data is protected using the strongest encryption available before you share it online.
References
- Ablebits, “How to protect and unprotect Excel sheet with or without password,” March 2023.
- Microsoft Support, “Protect an Excel file.”
- Microsoft Support, “Protect a workbook.”
- Causal, “Protecting Individual Worksheets by User in Excel,” April 2023.
- Modano, “Microsoft Excel Training - Different Levels of Protection.”
- Repair MS Excel, “5 Tricks To Protect Excel Workbook From Editing.”
- Microsoft Support, “Restrict changes to files in Excel.”
- OneModel, “Encrypting a Spreadsheet Using Excel,” May 2023.
- Office Watch, “Excel worksheet protection is not encryption,” May 2020.
- Indeed, “How To Encrypt an Excel File (With Steps),” June 2022.
- IONOS, “How to make an Excel file read only: step-by-step guide,” July 2022.
- Coefficient, “How to Password Protect Google Sheets,” May 2023.
- Dashlane, “A look at Password Health Scores around the world in 2022,” 2022.
- Kiteworks, “Everything You Need to Know About AES-256 Encryption.”
- Dashlane, “No Shortcuts: Why a Culture of Security is So Important,” January 2023.
- Dashlane, “Best Way to Store Passwords at Home or Work,” September 2022.
- Dashlane, “What Is a Good Password? 5 Tips for Increasing Password Strength,” November 2022.
- Dashlane, “What Is Password Sharing & When Should I Use It,” February 2023.
- Microsoft, “Encryption,” March 2023.
- Microsoft, “Protection and security in Excel.”
Sign up to receive news and updates about Dashlane